

How to Set Up Home Recording Studio
Last Updated: October 25, 2026
Quick Summary
A home recording studio requires four core pieces: an audio interface, a microphone, studio monitors, and headphones. Start with a quiet room you can control, treat it with acoustic panels and bass traps, set up your computer with an SSD and at least 8GB of RAM, then configure your DAW and audio drivers to begin recording.
- Choose a room around 10x12 feet with minimal external noise and a door you can close
- Audio interface needs at least two inputs, USB connection, and 24-bit/96kHz specification
- Position nearfield studio monitors at ear level in an equilateral triangle with your listening position
- Set input gain so peaks reach about -6dB to prevent clipping and distortion
- Use XLR cables for microphone connections and keep buffer size between 128-256 samples for recording
Table of Contents
- Plan Your Room and Studio Layout
- Home Recording Studio Equipment Essentials
- Setting Up Your Computer and Digital Audio Workstation
- Best Recording Software for Home Studio
- Home Recording Studio on a Budget
- Home Recording Studio Checklist and Signal Chain Setup
- Frequently Asked Questions
Plan Your Room and Studio Layout
The space you choose for your home recording studio determines everything: its size, shape, and acoustics dictate which gear makes sense and how you'll position it.
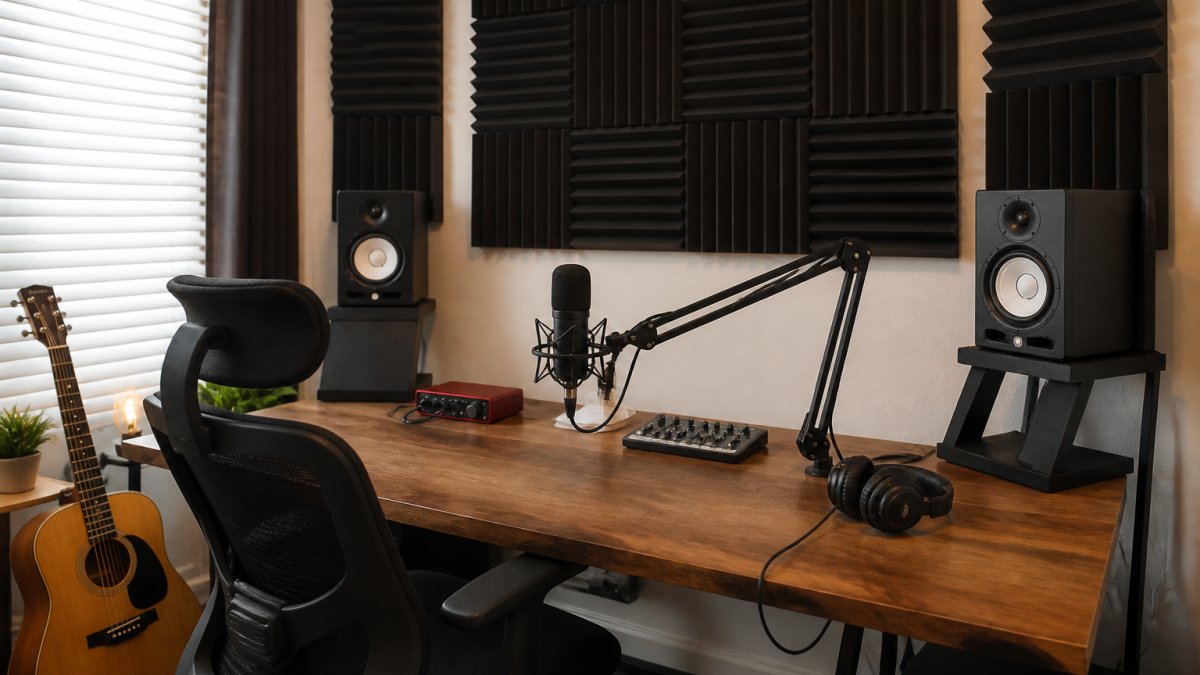
Choosing the right space
Start with a room you can control: minimal external noise and a door you can close.
Room dimensions matter. Smaller rooms (around 10x12 feet) are easier to treat and often sound better for vocals and instruments; larger rooms can sound hollow without treatment.
Natural light isn't critical, but ventilation is: your gear generates heat, and poor airflow leads to throttling and discomfort during long sessions.
Room treatment versus soundproofing
These two serve different purposes at very different costs.
Soundproofing stops external noise from entering and keeps your recording from disturbing others.
Room treatment controls how sound behaves inside your space, absorbing reflections, reducing flutter echo, and taming bass buildup.
Soundproofing keeps noise out; room treatment keeps your recording clean. Basic treatment in a quiet room yields excellent vocals and instruments; no amount of soundproofing fixes a noisy room.
Home Recording Studio Equipment Essentials
Every home recording studio needs four core pieces: an audio interface, a microphone, studio monitors, and headphones. Everything else builds around this foundation. RedOne Music Canada stocks professional-grade gear that home producers rely on to build studios that sound professional.
Audio interface and microphone
An audio interface bridges your microphone and computer, converting analog signals into digital data your DAW can record.
Look for at least two inputs, one for your microphone, one for a second instrument. USB interfaces are the home studio standard, simple to connect with no extra power supply. 24-bit/96kHz is more than sufficient; higher specs add cost without practical benefit.
Your microphone choice depends on what you're recording. Dynamic microphones like the Standz Dynamic Microphone suit vocals and loud instruments because they reject off-axis noise and handle high sound pressure levels.
For vocals, a dynamic microphone with a pop filter is standard; the filter prevents harsh plosives (P's and B's) from distorting your recording.
Studio monitors and headphones
Studio monitors reproduce audio accurately without coloration, so you hear what you're actually recording rather than what a consumer speaker makes it sound like.
Powered monitors have built-in amplifiers, so no separate amp is needed. Position them at ear level, equidistant from your listening position, angled slightly inward to form an equilateral triangle between you and the two speakers (Studio Monitor Placement | Genelec).
Headphones serve a different purpose. Use closed-back headphones during recording to prevent microphone bleed; open-back headphones sound more natural for mixing but leak sound into your microphone. Many studios keep both types on hand.
Cables, stands, and accessories
A quality microphone stand holds your mic stable and lets you position it precisely. Boom arms are popular because they free up desk space.
Cables connect everything. Use XLR cables for your microphone, the industry standard for balanced audio connections.
Every home recording studio needs four core pieces that form the foundation of your setup.
| Equipment | Purpose | Key Specification |
|---|---|---|
| Audio interface | Converts analog signals to digital data | At least two inputs, USB, 24-bit/96kHz |
| Microphone | Captures sound | Dynamic for vocals; condenser for instruments |
| Studio monitors | Accurate audio playback | Nearfield, 8 inches or smaller, powered |
| Headphones | Monitoring during recording | Closed-back for recording; open-back for mixing |
Setting Up Your Computer and Digital Audio Workstation
Your computer is the engine of your home recording studio, running your DAW, hosting plug-ins, and storing recordings. The specs you need are less demanding than you might think, but the wrong setup creates latency problems and crashes.
Computer requirements and performance
A modern laptop or desktop with a solid-state drive (SSD) and at least 8GB of RAM is sufficient for home recording.
Processor power matters, but not as much as people assume. A mid-range processor handles most home recording tasks; the real bottleneck appears when you load dozens of plug-ins or heavy virtual instruments.
RAM affects how many plug-ins and virtual instruments you can run simultaneously.
USB ports matter: your interface, microphone, and peripherals all need connections, and a laptop with only two ports becomes frustrating quickly. A powered USB hub with its own power supply solves this; avoid cheap hubs that introduce noise.
Configuring your DAW and audio drivers
Your DAW is the software where you record, arrange, and mix.
Latency is the delay between when you play something and when you hear it through your headphones; lower latency feels more natural when recording.
Audio drivers are software that let your computer communicate with your interface. Keep them updated. Outdated drivers cause crashes, noise, and connection problems.
Test your setup before recording.
Best Recording Software for Home Studio
Your DAW is where the actual recording happens. The best DAW for you depends on your workflow, budget, and the type of music you're making. Every major DAW can produce professional recordings. The differences are in interface design, included plug-ins, and workflow preferences.
Beginner-friendly DAW options
Many home producers start with free or low-cost DAWs, which have a gentler learning curve and let you develop skills without financial commitment.
The choice between DAWs often comes down to personal preference and genre. Hip-hop and electronic producers often prefer one DAW; singer-songwriters and podcasters often prefer another.
Add to Cart →
Your DAW should have built-in recording, editing, and mixing tools, support third-party plug-ins so you can expand functionality over time, and be stable, since crashes during recording are unacceptable.
Plug-ins and virtual instruments
Plug-ins are software tools that process audio, simulating hardware like compressors, EQs, reverbs, and delays. Virtual instruments generate sound: synthesizers, drum machines, and sampled instruments.
Many DAWs include a basic set of plug-ins, often sufficient for recording and basic mixing.
Microphone modeling plug-ins simulate the sound of expensive studio microphones. They're useful for adding character after the fact, but they cannot fix a poor initial recording.
Home Recording Studio on a Budget
Building a home recording studio doesn't require enormous spending. Many professional recordings have been made with budget gear. The fundamentals matter far more than the price tag. Decide what you're willing to spend, then prioritize ruthlessly.
Prioritizing your purchases
Start with the essentials: an audio interface, a microphone, and headphones. These three items determine your recording quality more than anything else.
Your second priority is monitoring. Studio monitors let you hear what you're actually recording.
Room treatment comes next. Acoustic panels and bass traps are affordable, dramatically improve your recording environment, and are the easiest upgrade to add later as your budget allows.
Cables, stands, and accessories come last. They're necessary but don't directly affect recording quality.
Budget-conscious alternatives and upgrade paths
Start with a single large-diaphragm condenser microphone if you're recording vocals and acoustic instruments.
Powered monitors are the home studio standard because they eliminate the need for a separate amplifier.
Headphones don't need to be expensive. Professional monitoring headphones are designed for accurate sound reproduction.
As your studio grows, upgrade strategically and replace the weakest link first.
Home Recording Studio Checklist and Signal Chain Setup
A signal chain is the path audio takes from your microphone to your computer to your speakers. Understanding it helps you troubleshoot problems and optimize your setup. The signal chain is: microphone → cable → audio interface input → computer (DAW) → audio interface output → monitors.
Pre-recording checklist
Before you hit record, verify these details.
Set your input gain so peaks reach about -6dB on your meter. This gives you headroom for louder passages without clipping (distortion from excessive level), which is permanent and ruins your recording.
Put on your headphones and listen to your microphone input. You should hear yourself clearly. If you hear distortion, lower your gain. If the signal is barely visible, raise your gain.
Connecting your signal chain
Your microphone connects to your audio interface with an XLR cable, a three-pin balanced connector that rejects electrical noise.
Your audio interface connects to your computer via USB. Use a high-quality USB cable.
Your studio monitors connect to your audio interface with either XLR or RCA cables, depending on your interface; check its output specifications.
Your headphones connect to the headphone output on your audio interface.
Gain staging and latency troubleshooting
Gain staging is setting the correct level at each stage of your signal chain.
Latency is delay between input and output.
If you hear crackling or pops during recording, your buffer size is too low for your computer to handle; increase it.
Test your setup with a simple recording. Record a few seconds of voice or instrument.
Building a home recording studio is a practical process, not a theoretical one.
Frequently Asked Questions
What equipment do you need to start recording at home?
A basic home recording studio requires an audio interface, microphone, studio monitors or headphones, cables, a microphone stand, and a pop filter. Your computer and digital audio workstation software complete the setup. Start with these essentials, then add instruments, MIDI controllers, or additional microphones as your needs grow. Quality matters more than quantity when beginning.
Can you set up a home recording studio on a budget?
Yes. Begin by prioritizing an audio interface and a decent microphone, as these directly affect recording quality. Use free or affordable DAW software like GarageBand or Audacity. A single pair of headphones works initially for monitoring. Acoustic treatment using blankets or DIY bass traps costs far less than professional soundproofing. Upgrade gradually as your skills and budget allow, focusing on gear that solves specific problems in your recordings.
What is the best software for a home recording studio?
The best recording software depends on your goals and budget. Beginner-friendly options include Reaper, Studio One Artist, and free alternatives like Audacity or GarageBand. Professional producers often choose Pro Tools, Logic Pro, or Ableton Live. Start with a DAW that matches your recording goals, whether vocals, instruments, or beat-making. Most offer free trials, so test several before committing. Your choice matters less than learning the software well.
How can you improve the sound of a room for recording?
Room treatment involves adding absorption and diffusion to reduce reflections and unwanted echo. Place acoustic panels, bass traps, or heavy blankets at reflection points on walls and corners. Position your microphone away from hard surfaces and corners where bass builds up. Measure your room using a smartphone app or meter to identify problem frequencies. Treat the room before investing in expensive gear, as poor acoustics undermine even professional equipment.
How much does it cost to set up a recording studio?
Costs vary widely based on your goals. Visit RedOne Music Canada's website for current pricing on specific equipment, and ask about financing options if you need flexibility with larger purchases.
What is the difference between room treatment and soundproofing?
Soundproofing blocks external noise from entering your room or prevents sound from escaping. It requires mass, air gaps, and professional installation. Room treatment controls reflections and echo inside the room using absorption and diffusion panels. For most home studios, room treatment is more practical and affordable than full soundproofing. Focus on treatment first to improve recording quality, then add soundproofing if external noise remains a problem.
How do you connect and configure your home recording studio?
Connect your microphone to the audio interface using an XLR cable. Connect the interface to your computer via USB. Plug studio monitors or headphones into the interface's outputs. Install your DAW software and audio drivers, then configure the interface as your default input and output device. Set your buffer size to balance latency and CPU performance, typically starting at 256 samples. Test recording and playback before your first session to ensure everything communicates correctly.

No comments yet
Be the first to share your thoughts on this article.
Leave a comment
Ready to find your sound?
Explore our wide selection of instruments, gear, and accessories. Whether you're a beginner or a pro, we've got what you need.