

Best Studio Monitors for Beginners in 2026
Last Updated: October 29, 2026
Quick Summary
The best studio monitors for beginners are compact, active speakers with balanced inputs, which suit most home studios. Their flat, neutral response shows what is really in your recording, helping you mix accurately without overspending on features you will not use.
- Choose woofers around 5 inches for most home studios, since they balance bass detail with desk-friendly size.
- Pick active (powered) monitors for simpler setup, matched amplification and fewer components on your desk.
- Look for balanced XLR or TRS inputs, which reject interference over longer cable runs.
- Check the frequency tolerance, such as ±3 dB, rather than trusting a bare low-frequency number.
- Treat the room with rugs, soft furnishings and panels before upgrading to bigger monitors.
Table of Contents
- What Studio Monitors Do and Why Beginners Need Them
- Studio Monitors vs Headphones: Which Should You Start With?
- Active vs Passive Studio Monitors: What Beginners Need to Know
- Choosing the Right Size: Why 5-Inch Studio Monitors Suit Most Home Studios
- Best Studio Monitors for Beginners in 2026: What to Look For
- How to Set Up Studio Monitors in a Small Home Studio
- Choosing Your First Monitors: Next Steps at RedOne Music Canada
- Frequently Asked Questions
Choosing your first pair of studio monitors is harder than it should be. Most search results are full of spec sheets and bold claims, and few explain what a beginner actually needs. RedOne Music Canada put this guide together to help musicians, producers and hobbyists make a sensible first purchase. The goal is simple: buy speakers that let you hear your music accurately, without overspending on features you will never use.
What Studio Monitors Do and Why Beginners Need Them
Studio monitors are speakers designed to reproduce sound as accurately as possible.
That neutrality matters most when you are mixing. A speaker that boosts bass or sparkles in the treble will tempt you to make adjustments that do not translate to other systems.
Monitors built for nearfield listening are placed close to the listener, usually one to two metres away. That placement reduces the influence of your room, which is a real advantage in a small space.
Studio Monitors vs Headphones: Which Should You Start With?
Headphones are the cheaper starting point, and many producers record and mix on them successfully.
Monitors win on how mixes translate. Speakers let you feel the air movement and judge stereo width the way most listeners will hear the track.
For most beginners, the practical answer is to start with a good pair of headphones for tracking and quick edits, then add monitors when you are ready to mix seriously.
Active vs Passive Studio Monitors: What Beginners Need to Know
Active monitors have a built-in amplifier. You plug them straight into an audio interface or mixer, and they are ready to use.
For beginners, active monitors are almost always the better choice. They are simpler to set up, the amplification is matched to the speaker design, and you need fewer components on your desk.
Check the product listing for the word "powered" or "active" before you buy, since the two types can look similar in photos.
Choosing the Right Size: Why 5-Inch Studio Monitors Suit Most Home Studios
Monitor size refers to the woofer diameter. Models with woofers around 5 inches are the most common choice for home studios because they produce enough low-frequency detail for mixing while fitting comfortably on a desk or a shelf.
Larger woofers push more bass and air, which is useful in bigger rooms but can overwhelm a small space.
If you record mostly vocals, guitar and acoustic music in a modest room, a 5-inch pair is a safe default.
Best Studio Monitors for Beginners in 2026: What to Look For
Before comparing models, know which features actually matter for a first purchase. The goal is not the longest spec sheet, it is a pair that lets you hear your mixes accurately in the room you actually have.
The specs that matter (and the ones that don't)
- Frequency response and tolerance: A wide, relatively flat response is what you want, but read the tolerance. A spec of "48 Hz-20 kHz ±3 dB" is more honest than "40 Hz-20 kHz" with no tolerance stated. Lower numbers are not automatically better if the speaker only reaches them quietly.
- Woofer size and room fit: Woofers around 5 inches are the most common beginner choice because they balance low-end detail with desk-friendly size. Models with 3- to 4-inch woofers suit very tight desks but will not give you reliable sub-bass. Models with 8-inch woofers can overwhelm a small untreated room.
- Amplification and headroom: Active monitors have built-in amplifiers matched to the drivers. Look for enough clean output for your room; more watts is not automatically better, and a well-designed 40 W pair can outperform a poorly tuned 80 W pair at moderate levels.
A simple decision framework
Use your room, genre, and workflow to narrow the field before you read a single review:
Buy Your First Acoustic Guitar →
- Small desk, shared room, casual production: A compact 3- to 4-inch powered pair keeps footprint and volume manageable. Expect limited sub-bass.
- Dedicated small room, mixing electronic or hip-hop: A 5-inch powered pair is the safe default. Add isolation pads and plan for a subwoofer later if low-end accuracy becomes critical.
- Recording vocals or acoustic instruments: Prioritize a neutral midrange and low self-noise over bass extension. A 5-inch pair with balanced inputs covers most home setups.
Budget-friendly picks for a first setup
For a first setup on a limited budget, look for a compact powered pair that suits desktop use and smaller rooms. Read the reviews and specifications carefully before buying, since budget models often trade some low-end extension for size and price.
Compact monitors for small rooms
If your desk is tight, compact monitors keep the sound close and controlled. Compare compact models side by side to decide which fits your room, weighing footprint and simplicity against output and headroom.
Common beginner buying mistakes
- Buying for bass, not accuracy: A boomy monitor flatters demos but misleads your mix decisions. Neutrality translates; hype does not.
- Skipping the interface: Monitors need a clean, balanced source. A cheap interface with balanced outputs is a better first upgrade than a bigger speaker.
- Ignoring placement costs: Stands, isolation pads, and cables add to the total. Budget for them alongside the speakers.
When you are ready to upgrade, the order that usually pays off is: room treatment first, then a subwoofer if low-end accuracy is limiting you, then a monitor controller, and only then a larger or more expensive pair.
Here is a quick reference for the specs and choices that matter most when buying a first pair of studio monitors.
| Factor | Beginner recommendation | Why it matters |
|---|---|---|
| Woofer size | 5-inch for most home studios | Balances low-end detail with desk-friendly size |
| Woofer size | 3 to 4-inch for very tight desks | Fits small spaces but lacks reliable sub-bass |
| Woofer size | 8-inch in small rooms | Can overwhelm a small untreated room |
| Amplification | Active (powered) monitors | Matched amplifier, simpler setup, fewer parts |
| Connections | Balanced XLR or TRS inputs | Rejects interference over longer cable runs |
| Frequency spec | Check the tolerance (e.g. ±3 dB) | An honest tolerance beats a bare low-frequency number |
| Room controls | Low-frequency cutoff and high-frequency trim | Helps compensate for a small room without treatment |
How to Set Up Studio Monitors in a Small Home Studio
Placement and connection often matter more than the monitors you buy. This section covers the full chain from interface to ear, so you can set up without extra research.
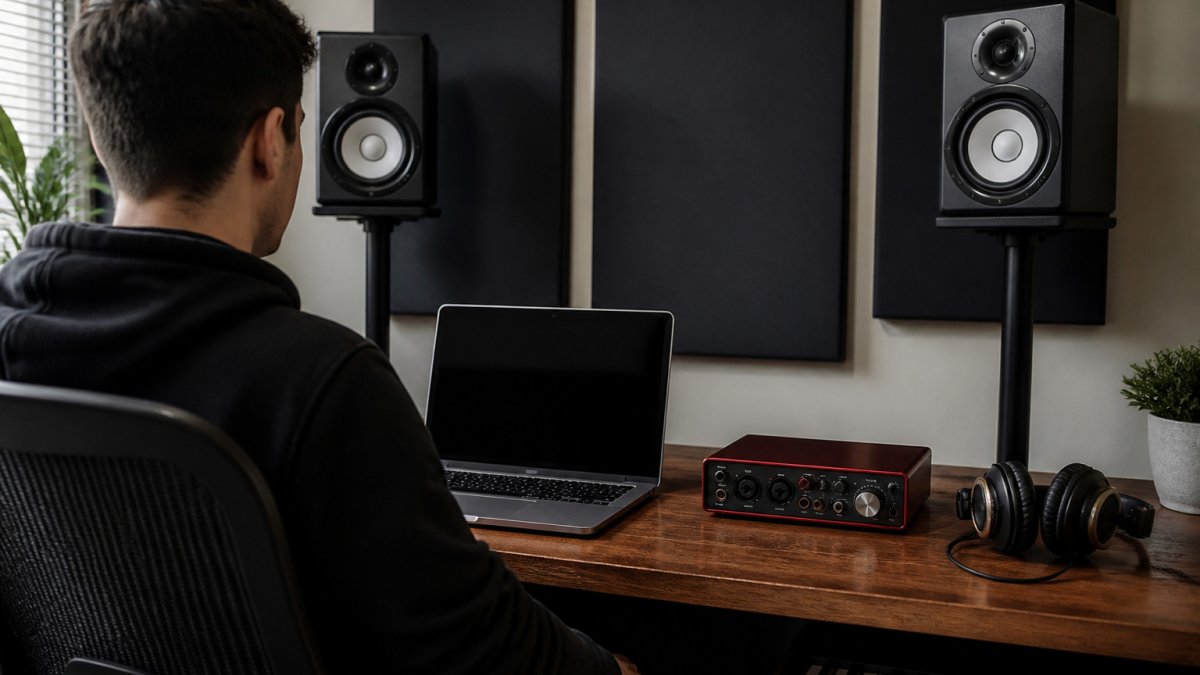
Step 1: Connect through an audio interface
Your monitors need a clean, controllable source. A basic audio interface with balanced outputs is the standard beginner path: computer to interface over USB, interface to monitors over balanced cables.
If you are starting without an interface, you can connect unbalanced RCA or 3.5 mm outputs directly, but expect more noise and less control over level. Treat an interface as the first upgrade if you plan to record or mix seriously.
Step 2: Choose the right cables
- Balanced XLR or TRS: The studio standard. Balanced connections reject interference over longer runs and are the safest choice for monitors.
- Unbalanced RCA or TS: Fine for short runs in a quiet room, but more prone to hum and noise.
- Match the connector, not the brand: A modest balanced cable from a reputable maker is enough. Do not overspend on cables before you have treatment.
Step 3: Position for accuracy
- Place the monitors on stands or sturdy isolation pads, with the tweeters at roughly ear height.
- Form an equilateral triangle between your two ears and the two speakers, with the tweeters angled toward the listening position.
- Keep the monitors a short distance from the wall behind your desk, typically at least a hand's width, to reduce boomy reflections. If the rear ports are close to the wall, engage the low-frequency cutoff switch if your monitors have one.
- Keep the desk and speakers symmetrical. An off-center setup skews the stereo image. For guidance on building out the rest of your room, see How to Set Up Home Recording Studio.
- Set the output levels on the monitors and interface to a comfortable listening volume, then keep it consistent so your mix decisions stay comparable.
Step 4: Calibrate by ear
You do not need measurement software to get a useful baseline. Play a familiar commercial track and listen for three things: whether the bass sounds even across the low end, whether the center image (usually the vocal) sits stable between the speakers, and whether the treble feels harsh at your normal listening level.
A monitor controller can simplify this setup by letting you switch between two sets of speakers and adjust volume from one knob. It is useful if you plan to compare two pairs of monitors or add a second listening system later.
Step 5: Treat the room cheaply
Room treatment helps more than most gear upgrades. Soft furnishings, rugs, and bookshelves reduce harsh reflections, and a simple acoustic panel behind the listening position can make a noticeable difference in a small space. Prioritize the wall behind the speakers and the first reflection points on the side walls. You do not need a full studio build, a few well-placed panels and a rug will change what you hear.
A realistic total setup cost
Budget beyond the speakers. A first setup typically includes the monitor pair, an audio interface, two balanced cables, and isolation pads or stands. Check current pricing on each item before you commit, and compare per-speaker versus pair pricing, since some listings quote a single speaker. Leave room in the budget for treatment; it is the cheapest upgrade with the biggest effect on translation.
Choosing Your First Monitors: Next Steps at RedOne Music Canada
Start by deciding how you will use your monitors, then set a budget you are comfortable with. A compact 5-inch powered pair will serve most home studios well, and you can always add a controller or upgrade later. Browse our current studio monitor range at RedOne Music Canada to compare models and find a pair that fits your room and workflow.
Frequently Asked Questions
What are the best studio monitors for beginners?
For most beginners, a pair of active near-field monitors with woofers around 5 inches offers the best balance of accuracy, size and cost. Look for a flat, neutral frequency response, a built-in amplifier so you do not need extra gear, and balanced inputs that connect to an audio interface. Compare several models in the same price range, listen to them if you can, and check that the size suits the room you plan to work in. Check current pricing on our website or request a quote before you buy.
Do beginners need studio monitors or are headphones enough?
Headphones are useful for tracking, editing and private listening, but they can exaggerate or hide certain frequencies and do not reproduce the room's sound the way speakers do. Monitors let you hear how a mix translates to other listening systems. Many beginners start with one good pair of headphones and add monitors once they begin mixing seriously. If your room is small or you share a space, headphones may be the practical starting point.
What size studio monitors should a beginner get?
Five-inch woofers are the most common choice for home studios, because they deliver usable low-end detail without overwhelming a small room. Larger models can work in bigger spaces, but they may produce more bass than a small room can control. Smaller models can be easier to place but may lack low-frequency extension. Match the size to your room, your listening distance and the type of music you make.
How should beginners position studio monitors?
Place the monitors and your listening position so they form an equilateral triangle, with the tweeters at roughly ear height. Keep the speakers away from walls and corners where reflections build up bass, and angle them slightly toward your ears. Use isolation pads or stands to reduce desk vibration. Small adjustments to placement can change the sound noticeably, so test with familiar reference tracks after each change.

No comments yet
Be the first to share your thoughts on this article.
Leave a comment
Ready to find your sound?
Explore our wide selection of instruments, gear, and accessories. Whether you're a beginner or a pro, we've got what you need.