

Avoiding Shipping Damage for Drum Kits: A Packing Guide
Last Updated: October 31, 2026
Quick Summary
To avoid shipping damage for a drum kit, take the kit apart, wrap each shell separately, and stop every drum from moving inside a sturdy box. Pad heads and bass drums fully, keep cymbals and hardware apart from shells, and shake-test the box before sealing it.
- Remove cymbals, stands, pedals, and hoops, and bag small parts with clear labels.
- Protect both bass drum heads with cardboard or foam before wrapping the shell.
- Put a foam ring or double bubble wrap between every nested shell so they never touch.
- Wrap each cymbal separately and pack it flat, never stacked edge to edge.
- Photograph the kit before packing and note any damage on the delivery receipt at the door.
Table of Contents
- Why Drum Kits Get Damaged in Transit
- Disassembling the Kit Before You Pack
- How to Pack a Drum Set for Shipping
- Shipping a Bass Drum Safely
- How to Ship Cymbals Without Cracks or Dents
- Choosing Boxes, Fill and Labels That Stop Movement
- How to Document Shipping Damage Before You File a Claim
- Your Next Step: Packing and Sending the Kit
- Frequently Asked Questions
Shipping a drum kit is one of the fastest ways to end up with cracked shells and bent hardware. Most damage happens in transit, not on the doorstep, and it is almost always preventable with the right packing approach. This guide walks you through how to pack a drum set for shipping so it arrives in one piece.
A drum kit is a bundle of fragile shells, thin hoops, and small metal parts that move easily when a box gets knocked around. Good packing works by stopping that movement before the box ever leaves your hands.
Why Drum Kits Get Damaged in Transit
Drum kits get damaged for a few predictable reasons. The shells crack when they hit each other or the box wall. Hardware bends when it shifts inside an oversized carton. Cymbals chip when they touch metal parts or get dropped on a corner.
Most of these problems come from empty space. When a drum can slide, it will hit something. Packing removes that space and gives every part a firm, padded spot.
- Shells crack from impact and pressure
- Hardware bends or snaps when it shifts
- Cymbals chip or dent against other metal
- Loose parts punch holes through the box
Disassembling the Kit Before You Pack
Take the kit apart before you pack anything. Remove the cymbals, stands, pedals, and any hardware that sticks out. Protruding parts act like levers and can crush the shells around them.
Keep every small part together in one labelled bag. Missing screws and clips are a common frustration after a move, so bag them as you go.
- Remove cymbals, stands, pedals, and hi-hat parts
- Take off hoops and lugs where possible
- Put small parts in sealed, labelled bags
- Photograph the setup before you take it apart
How to Pack a Drum Set for Shipping
Start with the largest drum and work toward the smallest, but treat each drum type differently, a bass drum, a tom, and a snare do not fail the same way in transit. The table below is the drum-by-drum checklist most guides skip.
| Drum / part | What to remove first | Padding and protection | Box strategy |
|---|---|---|---|
| Bass drum | Pedal, hoop-mounted hardware, front head if removable | Cardboard or foam discs over both heads, then full bubble wrap | Its own heavy-duty carton; never share with hardware |
| Toms | Mounting arms, hoops and lugs where possible | Wrap each shell, pad between nested drums | Nest smaller toms inside the bass drum or floor tom |
| Snare drum | Strainer, butt plate, hoops | Wrap separately; protect the snare wires with a rigid card | Own box or padded bag inside a larger carton |
| Cymbals | None, handle by edge only | Soft cloth then bubble wrap, packed flat | Dedicated cymbal box or separated compartment |
| Hardware | None | Bundle stands together, tape joints, bag clamps and wingnuts | Separate carton; never against a shell |
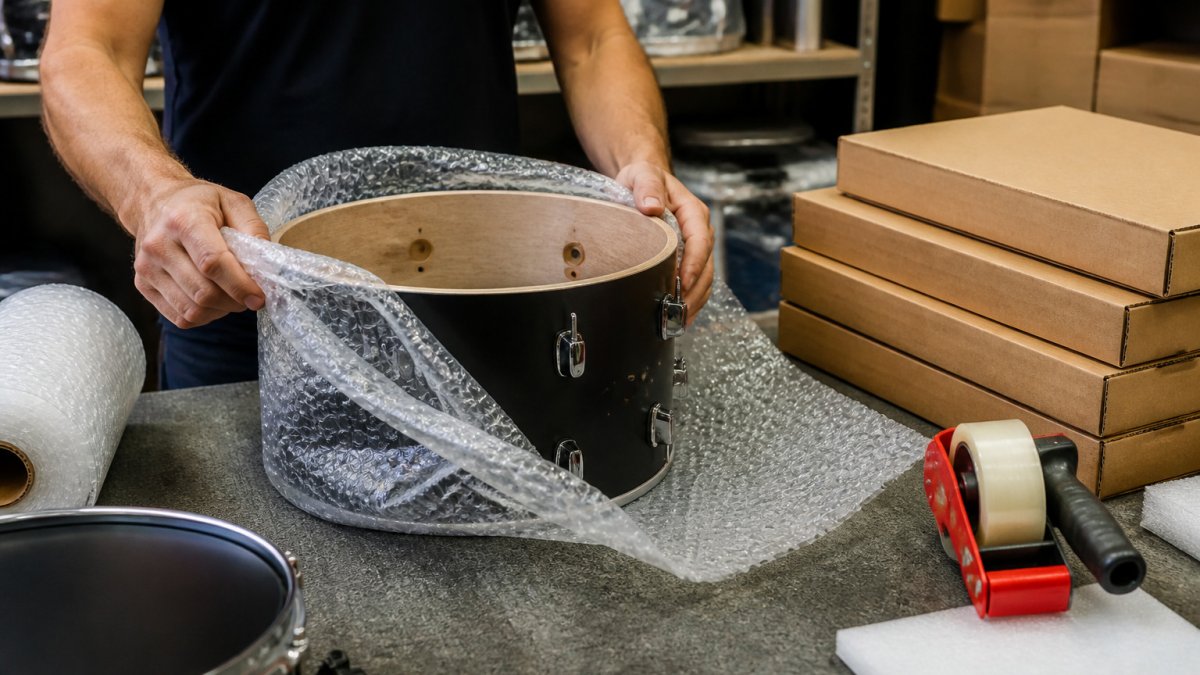
Prevent shell-to-shell contact. When you nest drums, put a foam ring or a double layer of bubble wrap between every shell. Two wrapped shells touching is still two shells touching, vibration compresses the wrap and the hoops can meet. A common pattern is to cut cardboard discs slightly larger than the drum head and sandwich one between each nested drum.
Use a movement test, not a guess. After packing, close the box and shake it gently. Nothing should shift, rattle, or thud. Then press the top of the box: it should give slightly but not collapse to the contents. Leave a generous layer of padding on every side of a shell, and more on the bass drum heads. If you can hear a drum move, add fill and test again.
Mind weight distribution. Put the heaviest items, hardware, bass drum, at the bottom of a multi-item carton and lighter drums on top. A carton that is top-heavy tips in handling, and a falling stand inside a box is one of the most common causes of dented shells.
Match the box to the load. Use a heavy-duty, double-wall carton rated for the weight inside. A box only slightly larger than the padded contents is ideal; too much empty space means more fill and more movement. Seal all seams with reinforced packing tape, and tape the bottom seams in a cross pattern so the box cannot open under load.
!Hands wrapping a tom drum shell in bubble wrap on a workbench next to a stack of shipping cartons and packing tape
Shipping a Bass Drum Safely
The bass drum is the hardest piece to ship. It is large, round, and has a fragile head that can puncture or tear. Wrap the shell completely and protect both heads with cardboard or foam before wrapping.
Ship the bass drum in its own box with extra padding on every side. Do not let it share a carton with heavy hardware, since a falling stand can dent the shell.
Buy Your First Acoustic Guitar →
Watch out: a bass drum shipped without head protection can puncture in transit.
How to Ship Cymbals Without Cracks or Dents
Cymbals crack and dent when they touch each other or metal parts. Wrap each cymbal separately in soft cloth or bubble wrap, then place them flat in a sturdy box. Never stack cymbals directly on top of one another.
Keep cymbals away from stands and hardware. A single metal edge pressed against a cymbal is enough to dent it.
- Wrap each cymbal separately in cloth or bubble wrap
- Pack cymbals flat, never stacked edge to edge
- Use a dedicated box or a clearly separated compartment
- Keep stand arms and clamps away from cymbal edges
Choosing Boxes, Fill and Labels That Stop Movement
Pick a box that is only slightly bigger than the items inside. A box that is too large lets parts slide, and a box that is too small crushes the padding. Use heavy-duty cartons rated for the weight of the drum or hardware.
Fill every empty pocket with packing paper, foam, or crumpled cardboard. Shake the box gently after packing. If anything rattles or moves, add more fill and test again.
Label every box clearly with "Fragile" and "This Side Up" markings. Label the contents too, such as "Bass drum" or "Cymbals," so the carrier and receiver know what is inside.
- Choose a box close in size to the contents
- Fill all gaps so nothing can slide
- Shake-test the box before sealing
- Label fragile, this-side-up, and contents
How to Document Shipping Damage Before You File a Claim
Photos are the foundation, but a claim usually fails on paperwork, not on evidence. For guidance on handling instrument returns and the claims process, read how to return musical instruments safely. Build the file before the box leaves your hands.
Before you ship:
- Photograph every drum, cymbal, and hardware piece unwrapped and wrapped, plus the sealed box from all sides.
- Keep the receipt and the tracking number with your photos.
- Record the declared value you set at drop-off. Carriers often limit liability for musical instruments unless a higher value is declared, so decide the declared value before you hand over the kit.
- Ask the carrier what its limit is for musical instruments and whether the contents are excluded from standard coverage. Confirm the carrier's instrument coverage in writing or on its published terms before you ship.
When the box arrives:
- Inspect the outside before signing. Note any crush, puncture, or water damage on the delivery receipt at the door, this is the single most important step for a later claim.
- Photograph the box from every side before opening it.
- Unpack slowly and photograph each drum and part as it comes out.
- Keep every box, piece of fill, and wrap until the kit is fully checked. Carriers may ask to inspect the packaging.
If you find damage:
- Report it to the carrier within its stated claim window and keep a copy of the report.
- Submit the claim with your pre-ship photos, delivery photos, receipt, tracking number, and declared-value record.
- Do not repair or discard the damaged item until the claim is resolved; an inspector may need to see it.
Your Next Step: Packing and Sending the Kit
Set aside time for a careful pack. Disassemble the kit, wrap each shell, fill every gap, and label every box. A little extra time at the packing stage prevents most shipping damage.
Once packed, double-check the seals and labels before handing the kit to the carrier. Then send your kit off knowing it is ready for the journey.
Frequently Asked Questions
How do you pack a drum kit for shipping?
Remove the heads, hardware and small parts first, then wrap each shell separately in padding or bubble wrap. Nest smaller drums inside larger ones only if each shell keeps its own padding, and place every piece in a box with at least a few centimetres of cushioning on all sides. Hardware, cymbals and small parts should go in their own sealed bags and be taped to the outside of the carton or packed in a separate box so they cannot strike the shells. Fill any empty space so nothing can shift when the box is handled or tilted, and label the carton as fragile. Where possible, use a heavy-duty carton sized to the largest drum with room for padding. Check the carrier's packaging rules before you send, since they set the maximum dimensions and weight you can use.
Should you take a drum kit apart before shipping?
Yes. Taking the kit apart is one of the most effective ways to prevent damage. Shells, hardware, stands and pedals are all more vulnerable when they are attached, because a single impact can transfer force to the rest of the assembly. Disassembling also lets you pad each component on its own and reduces the number of protruding parts that can puncture packaging or crush neighbouring pieces. Keep a photo log of how everything fits together before you remove it so reassembly on arrival is quick and accurate.
How do you prevent a drum kit from moving inside a shipping box?
Movement is what causes most internal damage, so the goal is to leave no gaps. Use crumpled packing paper, foam or padded dividers to fill every void between shells and the carton walls. Test the packed box by lifting it and shaking it gently; if you hear or feel anything shift, add more filler and repack. Securing shells with tape or strapping inside the box, and keeping the heaviest items at the bottom, further reduces movement during transit.
What should you do if a drum kit arrives damaged?
Stop before unpacking further and photograph the outer box, the damage on the packaging and each damaged component from several angles. Keep all packing materials until the claim is settled, because the carrier may ask to inspect them. Report the damage to the carrier promptly according to its claim deadlines, and retain your proof of value and packing photos. Contact the seller as well so the damage is recorded with your order.

No comments yet
Be the first to share your thoughts on this article.
Leave a comment
Ready to find your sound?
Explore our wide selection of instruments, gear, and accessories. Whether you're a beginner or a pro, we've got what you need.